Learning to hold a fountain pen properly is like learning to ride a bicycle — once you get it right, it becomes second nature. But until you find that sweet spot, fountain pen writing can feel awkward and frustrating. After teaching handwriting for over thirty years, I can tell you that proper pen grip is the foundation of enjoyable fountain pen writing.
The good news is that fountain pens are actually more forgiving than ballpoint pens when it comes to grip variations. However, there’s definitely a technique that will give you the smoothest, most comfortable writing experience. Today, I’ll walk you through the proper way to hold a fountain pen, explain why it’s different from holding other pens, and share tips to help you master the technique quickly.
Whether you’re picking up your first fountain pen or struggling with an inconsistent writing experience, getting your grip right will transform how fountain pens feel in your hand.
Why Fountain Pen Grip Matters More
Unlike ballpoint pens that work regardless of how you hold them, fountain pens are designed to work optimally at specific angles and with particular finger positions. Understanding why this matters will help you appreciate the technique.
The Physics of Fountain Pen Flow
Fountain pens deliver ink through capillary action, which works best when the nib maintains proper contact with the paper surface. The angle at which you hold the pen affects how the ink flows and how smooth the writing feels.
- Optimal ink flow: Proper angle ensures consistent ink delivery
- Reduced skipping: Correct contact prevents hard starts and interruptions
- Even line width: Consistent angle produces uniform strokes
- Less hand fatigue: Natural positioning reduces strain
The “Sweet Spot” Concept
Every fountain pen nib has a “sweet spot” — the exact angle and orientation where it writes most smoothly. Learning proper grip helps you find and maintain this sweet spot naturally as you write.
The Correct Fountain Pen Grip
The proper fountain pen grip differs from ballpoint pen technique in several important ways. Let’s break down each element step by step.
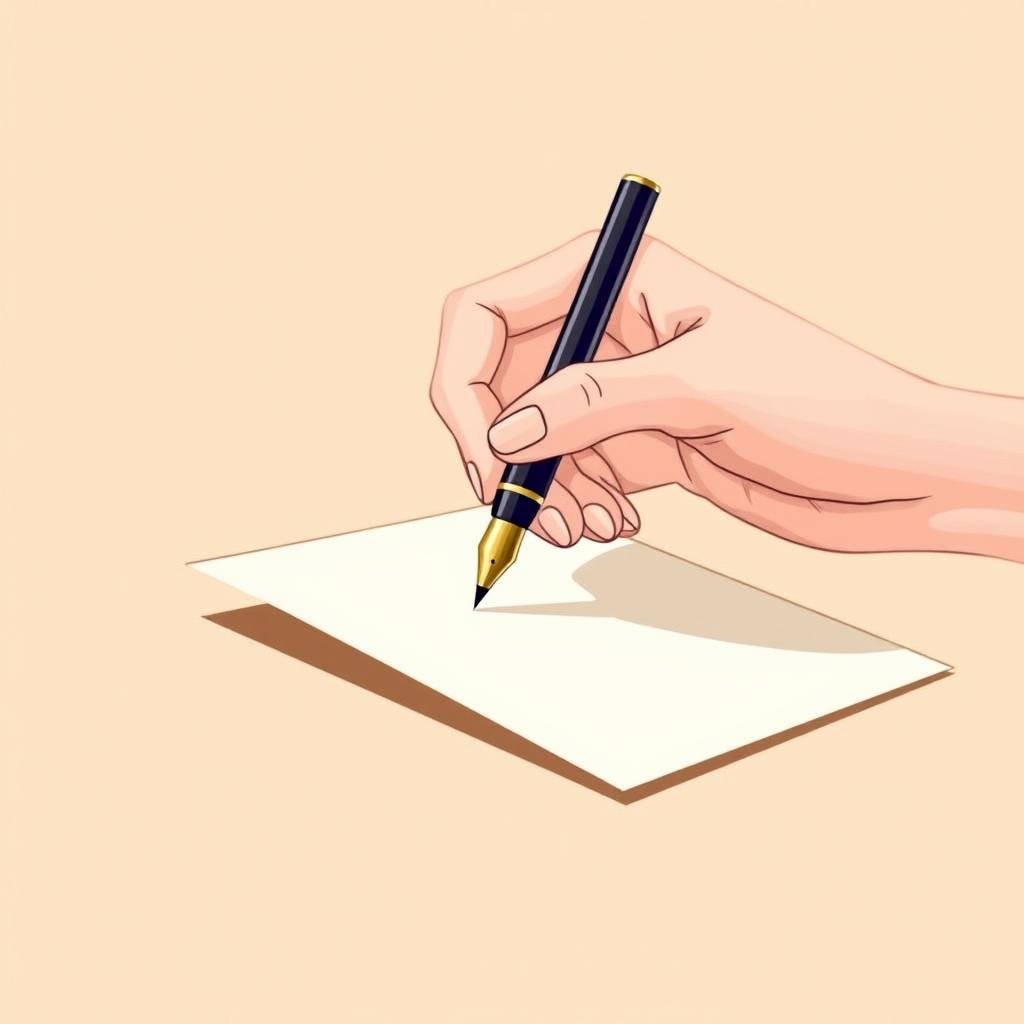
Step 1: Finger Positioning
Start with the classic tripod grip, but with specific adjustments for fountain pens:
📍 Index Finger: Place on top of the pen barrel, approximately 1 inch above the nib. This finger guides the pen’s movement.
👍 Thumb: Opposite the index finger, creating gentle pressure to secure the pen. Don’t squeeze — just maintain contact.
🖕 Middle Finger: The pen rests on the side of this finger, which provides support and stability during writing.
Step 2: Finding the Right Angle
This is where fountain pens differ most significantly from other writing instruments:
✍️ 45-Degree Angle: Hold the pen at approximately 45 degrees to the paper surface. This is typically lower than how you’d hold a ballpoint pen.
🎯 Lamy Safari Advantage: The Lamy Safari’s triangular grip naturally guides your fingers into the correct position, making it excellent for learning proper technique.
Step-by-Step Grip Setup
Follow this sequence to establish your fountain pen grip correctly every time:
The Setup Process
- Remove the cap and set it aside or post it on the pen’s end
- Place your thumb and index finger about 1 inch above the nib
- Rest the pen on the side of your middle finger
- Angle the pen at roughly 45 degrees to the paper
- Check that the nib makes full contact with the paper surface
- Write a few test strokes to ensure smooth ink flow
Pressure Guidelines
One of the biggest adjustments for new fountain pen users is learning to use minimal pressure:
Light touch
Just enough contact to maintain control — the pen’s weight does the work.
Relaxed fingers
No white knuckles or cramped muscles — comfort is key.
Natural flow
Let the ink flow freely without forcing it through pressure.
Death grip
Squeezing the pen tightly leads to hand fatigue and poor ink flow.
Pressing down
Excessive downward pressure can damage the nib and scratch the paper.
Common Grip Problems and Solutions
Most fountain pen newcomers experience similar grip challenges. Here are the most frequent issues and how to address them:
Problem: Scratchy Writing
If your fountain pen feels scratchy or skips, the issue is often grip-related rather than a defective pen.
Likely Cause: Holding the pen at too steep an angle, using excessive pressure, or rotating the pen so the nib isn’t properly aligned.
Solution: Lower the pen angle, lighten your touch, and ensure the nib’s slit faces directly up.
Problem: Inconsistent Line Width
If your lines vary in thickness unexpectedly, your grip may be shifting during writing.
Solution: Focus on maintaining consistent finger positions and pen angle throughout your writing session.
Problem: Hand Fatigue
Soreness after short writing sessions usually indicates grip problems.
Solution: Relax your grip, use lighter pressure, and ensure your hand position feels natural rather than forced.
Practice Exercises for Better Grip
Like any skill, proper fountain pen grip improves with deliberate practice. These exercises help develop muscle memory:
Exercise 1: Slow Circles
Draw large, slow circles focusing entirely on maintaining consistent pen angle and pressure. This builds steady control.
Exercise 2: Alphabet Drills
Write the alphabet slowly, paying attention to grip rather than speed. Notice which letters challenge your grip consistency.
Exercise 3: Line Variations
Practice drawing lines of different lengths while maintaining the same grip. This teaches you to move the pen while keeping your fingers stable.
Grip Adjustments for Different Hand Sizes
Not everyone’s hands are the same size, so grip positioning may need adjustment based on your anatomy:
Smaller Hands
- Grip closer to the nib: 3/4 inch above instead of a full inch
- Consider shorter pens: Kaweco Sport or Lamy Safari work well
- Use the pen unposted: Don’t put the cap on the back
Larger Hands
- Grip slightly higher: 1.25 inches above the nib
- Post the cap: Use the cap on the back for better balance
- Choose larger pens: Pilot Metropolitan or TWSBI Eco offer more substantial grips
Frequently Asked Questions
How long does it take to develop proper fountain pen grip?
Most people develop comfortable muscle memory within 1-2 weeks of regular practice. Daily writing sessions of 15-20 minutes are more effective than longer, infrequent practice.
Is it okay to hold a fountain pen like a ballpoint pen?
While fountain pens will work with various grips, proper technique significantly improves the writing experience and reduces hand fatigue.
Should I post the cap when writing?
This depends on your hand size and the pen’s design. Try both ways — some people find posted caps provide better balance, while others prefer the lighter feel without posting.
What if my handwriting gets worse when I change my grip?
This is completely normal! Your handwriting may temporarily decline as you develop new muscle memory. Stick with proper technique — your writing will improve within a few weeks.
Final Thoughts
Mastering proper fountain pen grip is one of the most valuable skills you can develop as a fountain pen user. While it may feel awkward initially, the improved comfort, smoother writing, and reduced hand fatigue make the learning process worthwhile.
Remember that everyone’s hands are different, so use these guidelines as a starting point and make small adjustments based on your comfort and writing results. The goal is to find a grip that feels natural while allowing the fountain pen to work as designed.
Practice regularly but don’t rush the process. Good technique develops gradually through consistent use rather than forced perfection. Soon, proper fountain pen grip will become as automatic as walking, and you’ll wonder how you ever wrote any other way.
Most importantly, be patient with yourself. Every fountain pen enthusiast went through this learning process, and with time and practice, you’ll develop the confident, comfortable grip that makes fountain pen writing such a pleasure.